Thursday, November 24, 2011

Our First Noel...

Now that my belly is full of turkey, sweet potato casserole, and mom's delicious pecan pie, the Christmas season is finally upon us!  I am excited for Zac and I to spend our first Christmas together in our home.  What better way to enjoy this season than to deck the halls with Christmas cheer?  In the decorations department, we are basically starting from scratch so I have lots of incentive to save as much money as possible when gathering decorations!

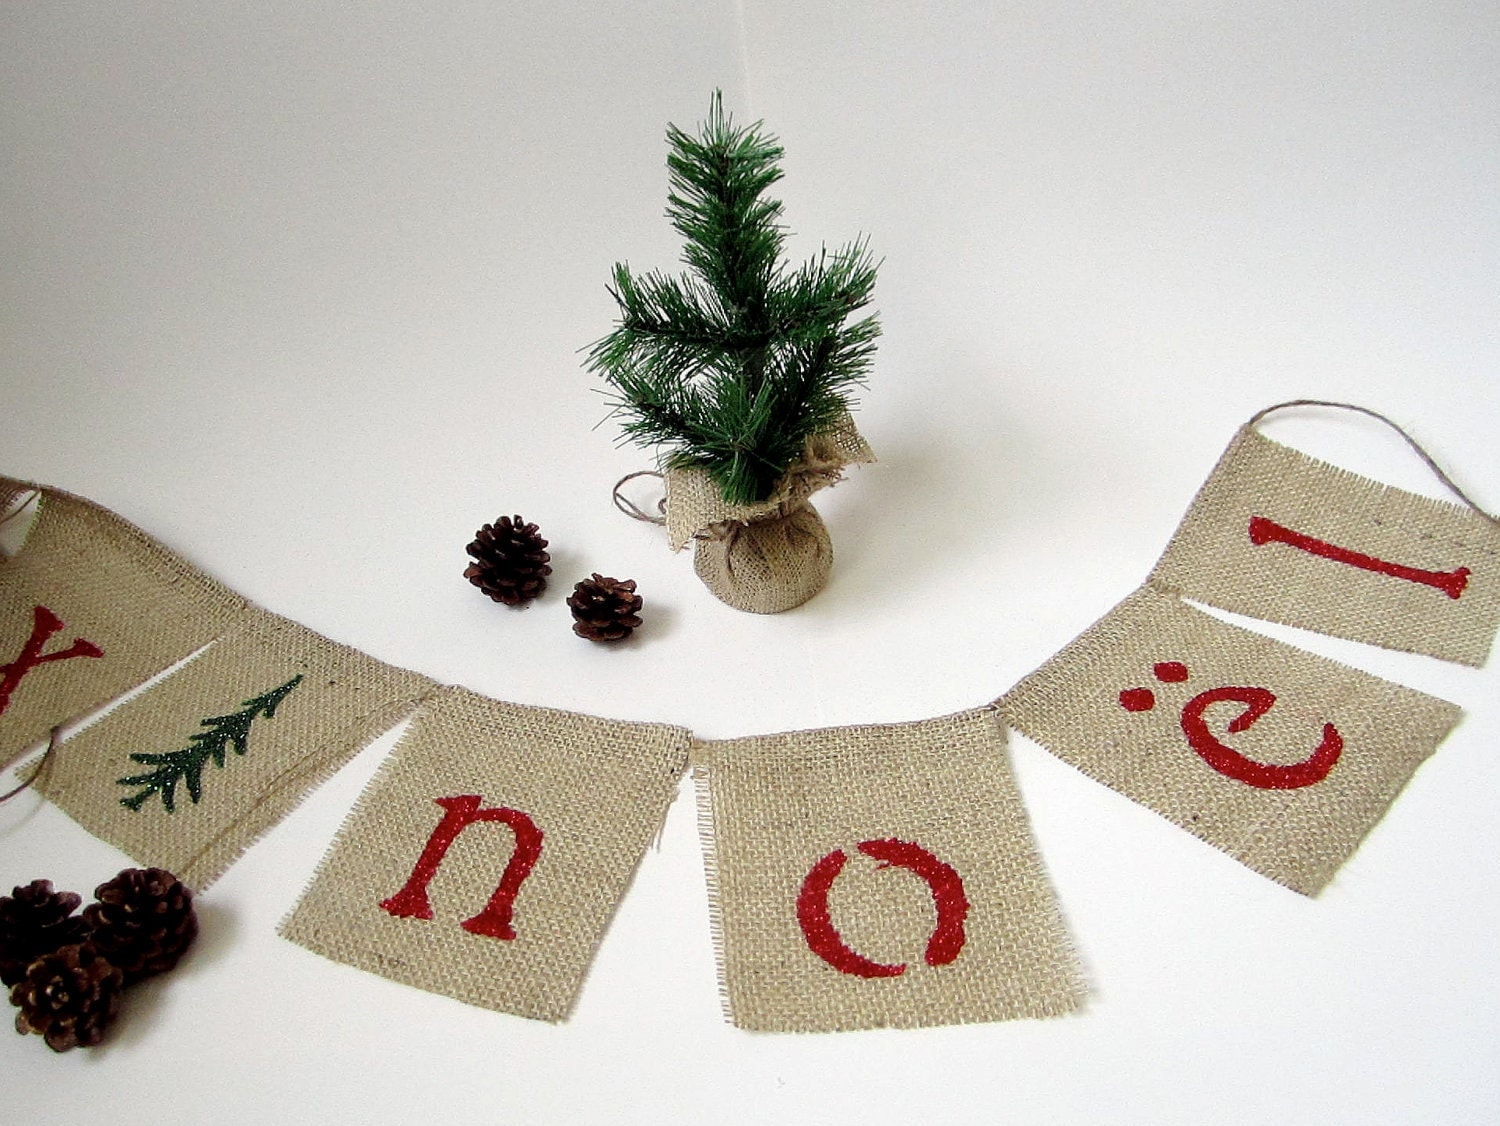
I splurged on these gorgeous burlap stockings, so I am trying to cut back spending on other items to make up for it :) I found this adorable "Noël" banner, by baybeedahlboutique on Etsy, and was dying to have it for our den (which we having lovingly named the Lodge)!


The cost on Etsy was $20 plus shipping, but I was able to get all of the materials I needed for less than $5.00!  What you need for this project:
1. 1/4 yard burlap, maybe less - Burlap is $3/yd at Wal-mart
2. 1/4 yard canvas, maybe less - Canvas is about $4/yd at Wal-Mart3  
3. Red and Green acrylic paint - These are on sale for about $1 at Hobby Lobby all the time
4. Jute twine string - You only need about 5' 
5. Hot glue gun/glue sticks

Start by cutting out one rectangle of burlap and one rectangle of canvas (for the back of burlap) for each letter you want.  I cut mine to be 9"x7".  On a low setting, iron each pair of canvas and burlap to make them easier to work with.  Once each set is ironed, put a line of hot glue along the top edge (the 7" inch side) of the canvas and secure the burlap on top.


Find a font you like and use a felt pen to free-hand the outline of each letter on the burlap rectangles.  You could also use stencils if you prefer.  Using the acrylic paint of your choice, paint the letter using the outline as your guide.  If you end up being able to see a bit of where the pen line was, it will still look great when hung up!

Measure the twine to be the length you want for your mantle or wall.  Once each letter is painted, fold the top of each rectangle around the jute twine and hot glue in place!  Check out how mine came out: 


I LOVE the rustic look of this banner- it is absolutely perfect for our "lodge"!

Sunday, October 30, 2011

Newborn Football Beanie

Since Noah will be here in time to catch the last 3-4 weeks of the NFL season, I think a football outfit is a wardrobe must-have!  Dad-to-be, Brandon, is a huge Green Bay fan so I am envisioning lots of cute family pics of Brandon and Stacey in their Packers jerseys with Noah dressed as the football.  Check out the finished product:

The football onesie is an idea I got from Pinterest

I followed a really easy knitting pattern to make the beanie.  It only took about 2 hours to make!
I think the outfit turned out really cute, but it will definitely be cuter with my nephew in it!

Saturday, October 8, 2011

A World-Class Retirement Party (For a world-class dad!)

After 33 years working for J.C. Penney, my dad finally said his goodbyes last Tuesday.  Growing up I have learned so many things from listening to his stories about work to observing the way he carried himself with integrity each day.  It only seems fitting that our family throw him a "world-class" retirement party to celebrate his profound accomplishments!

My mom and dad have always loved going on adventures together and are excited about the opportunity to travel even more in retirement.  My mom wanted to capture their love for travel in the invitation so here is what I came up with (you'll have to excuse the pics, photography is not my forte...):


I ordered these adorable map seals from Zazzle to complete the look!  I really like how it all came together, but more importantly I know October 23rd will be a great evening to celebrate a great dad. 

Saturday, October 1, 2011

A Wedding [Invitation] to Remember

As I began to decorate our house this summer, I really wanted something cool to hang above the piano that wouldn't cost too much money... and this is what I came up with:

One of my favorite details of our wedding was the invitation suite, so I figured this was a cool way to preserve a piece of May 21st, 2011.  I love the way it all came out and love the price even more!  The total cost of the project was less than $5.  All it took to make my idea come to life was some navy card stock, 8" paper doilies I already had at home, wooden diploma frames I got on sale at Hobby Lobby, and of course my favorite paper goods from the wedding!  I  arranged the doilies and invitations to my liking, glued it to the card stock, and voilá - a special memento (not to mention a super cute wall decoration) was born!  


Saturday, September 17, 2011

Adorable Knit Headband!

This is what I have been up to while watching It's Always Sunny this weekend... knitting this precious headband!  I knit a few headbands for people last winter, but never got around to making one for myself- I think this is going to be one of my favorite fall/winter accessories :)

To make the headband I followed a super easy pattern I found online last winter. This morning I stumbled across an even easier pattern to make the bow to go on top. I'm in love with how it came out!

Isn't the mustard color cute?


Thursday, September 15, 2011

Design on a Dime

My job with PwC didn't begin until July 25, so for the first 2 months Zac and I were married, we were living on just one income!  I definitely didn't want to wait 2 months to decorate our house, so I decided to get creative outfitting our home.  We have two living areas and only had hand-me-down furniture for one of the two rooms so I had a big project on my plate.

The first addition to the room was an old coffee table from Zac's mom.  Zac and his roommates used it during college and the table had the scratches, stains, and burns (yes. burns.) to prove it. I sanded it down and restained the table with Minwax Dark Walnut  stain, and it came out looking like a new table!


Next I bought:

  • estate sale couch for $120 (it looks new and is super comfy!)
  • accent pillows for $10 at JCPenney (duh.)
  • curtains on sale at JCP for $20
  • a 5' x 8' rug on clearance at JCP for $55
  • random frames from Hobby Lobby and around the house for $10
  • one can of gold spray paint for $3
And for those $218 spent the room came out looking like this:


 Not bad for such a small investment, huh?
I was definitely satisfied with the outcome but knew I wanted a chair for the room, so I began searching for the perfect chair on Craigslist!  I looked every day for a few weeks until I came across this baby for only $60:


I found essentially the same chair on Amazon for $353.74!


So for a grand total of $278, we have a lovely front room that gives our home a bit of personality... all for LESS than the price of the new chair! That's what I call design on a dime.


One thing I have learned from Zac is that patience pays off.  Being on a budget certainly does not mean you have to sacrifice style. I was able to create a room that mirrored my unique appetite for design at a price within our budget... with a little patience, you can too!

Tuesday, September 13, 2011

DIY Fall Wreath

It has finally happened... I decided to make my debut in the blogging world.  Once I said "I do", the clock started ticking... I knew it wouldn't be long before I joined the ranks of blogger wives!  Here goes...

The fall weather preview that graced Dallas last week really put me in the mood to begin transforming our house for Fall!  The first thing on the list was to put up a cute fall wreath so, as a newlywed on a budget, I decided to get ideas of what I liked on Etsy then head to Hobby Lobby to get some inexpensive supplies!  Here are a few of the wreaths I really liked:


I love all the fall berries on this wonderful wreath from Etsy vendor twoinspireyou

I like how the burlap on this wreath by Etsy vendor LittleBigNest makes it look more modern and earthy!
After getting some good ideas, I decided to invite my mom, sister, and best friend over to join me in the wreath-making fun!  We all went to Hobby Lobby together and came back with very different supplies... can't wait to show you our finished products- but first, I will walk you through the steps to make a cute, earthy, autumn wreath (not to mention super easy!).

At HL I purchased:
  • a small hay wreath for $2.00
  • a package of wreath pins for $1.44 (I used about 1/100 of the pins)
  • some fall berry stems for $4.50, and
  • a roll of ribbon to coordinate for $2.00 (I only used about 12"-15" of the roll)
I already had a few yards of burlap at home leftover from another project, so I got it out and cut a few strips about 1"-2" wide.  Using a floral pin to secure the first strip, I began wrapping the burlap strips around the wreath, securing the burlap periodically with floral pins, until the whole wreath was covered.


Once the wreath was entirely covered in burlap, I cut the berry stems into individual "branches" and began to arrange them.  To get the berry branches to sit the way you want them to, use floral pins to secure them.

Fall berry stems.  I only used 2 stems to make this wreath so I have one left for another project... coming soon!


Once I covered the area I wanted with berry stems, I tied a bow around the side of the wreath opposite the berries so the bow would be asymmetrical when I hung it up.  This wreath took less than 20 minutes to make. Here is the finished product!


How do you like the finished product?  What would you add or change?